Showing posts with label CCTV DVR. Show all posts

First, here are some of the benefits of connecting your DVR to your network

First, here are some of the benefits of connecting your DVR to your network

Being able to watch your security cameras while you are away from the location is one of the most important features of current DVRs. This will give you the ability to prevent crimes as well as keep an eye on what is currently happening in the locations that the cameras are watching over.

Being able to review and back up footage from your DVR remotely so that you have a copy of what is happening even if the DVR ends up getting damaged or stolen.
Being able to configure the DVR and specialized cameras remotely. This is handy if you notice that the DVR needs to have some of its configurations modified.
Being able to change settings on cameras that are all of a sudden not able to see due to conditions changing. Some people have had issues where their cameras looked great the whole first week that they had them set up but then all of a sudden a big storm comes in and they can’t see anything anymore and one of the camera’s may have a setting which can compensate for this condition change. If you’re not able to reach the location where the DVR and cameras are installed, this will allow you to change the settings from wherever you are so that you don’t miss out on anything in the meantime. However, please note that some cameras do not have these features, but for the ones that do, being able to access them remotely is a great feature to have.

There are a few basic things you will need in order to get started.

Live Internet Connection. This can come from any internet service provider in your area. The faster the speeds they are able to provide you with, the better. However, it’s still possible to view your system remotely with a slower connection such as DSL. Usually the internet service provider will provide you with the option to rent a modem from them unless you have your own available for setup.

Router 

A Router is a device which forwards the data between your network connections. This will allow you to connect multiple devices to your single internet connection. Many homes today currently have Wi-Fi Routers that will allow you to connect your devices to your internet wirelessly. You will not need a wireless router to access your DVR remotely, so just about any router will do. Some of the larger router brands are Linksys (Cisco), D-Link, Netgear, Belkin, and even Apple.


Ethernet Cables


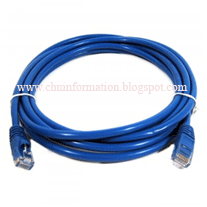
These are usually sold as CAT5 (Category 5) cables which are used to connect you to the internet. Most DVR’s with the ability to be viewed remotely will come with a network port that you can attach your cat5 cable to. Sometimes the manufacturer will even include a cable with the system but unless you are planning on connecting your DVR near your router, most of the times the cable is too short. Be sure to measure out how many feet of cable you will need before purchasing your system. You will also need one Ethernet cable to connect the modem to the router. Routers usually come with their own short Ethernet cable as well.
DVR with the ability to be remotely viewed


Not all DVRs have the ability to be viewed remotely. Some DVRs are just for recording and will not have the features that allow for you to connect to them through the internet. Make sure the DVR you have is capable of doing so by contacting the manufacturer or checking the manual that came with it.

Monitor


For the initial setup, you will need some sort of monitor so that you can connect your DVR and view all of the settings you are configuring. Once these settings are configured, you will no longer need the monitor if you are only going to view the system remotely. Some DVRs have outputs that will also allow you to use a television as a monitor by connecting it using BNC, HDMI, VGA, or even composite RCA connections depending on the devices that you purchase.


Get Started


1.            Make sure that your Modem is connected to the internet. Usually modems will have a series of lights on the front which are status lights to let you know that it’s currently working. All modems are different so many sure you get the information for yours from your service provider or its manual. Getting the model setup and connected is beyond the scope of this article and this step needs to be completed before moving forward.
2.            Connect your modem to the internet port on your router. Usually your router will have one port for the internet connection. This port is usually away from the other ports on the back of the router which are for the devices which will be connecting to the internet. Use a cat5 cable for this connection.
3.            Connect your DVR to one of the data ports of your router. Most routers come with at least 4 ports for hardware that will be connecting to the internet. You will also be using a cat5 cable for this connection. For the initial setup, you will not need the long cat5 cable if you are planning on relocating the DVR to a location that’s far away from the router. You may always move the DVR after the initial setup so the cable that came with your DVR should be fine.


4.            Connect your DVR to your monitor. This can be done using any of the methods available depending on the type of monitor you are using and DVR outputs available. If you have an HDMI or VGA port on both the DVR and Monitor, one of these are the preferable ones to be used.
Now that you have your hardware setup and connected, make sure everything is powered on and working. Next, check out the next step to configure your router and DVR and you will soon be able to view it remotely.  All of their DVRs have the same interface when you log into them so configuring them will be pretty much the same. Other DVR’s may have menus that look a bit different but the settings are all generally the same. Same goes for the Router settings.


Configure your DVR


Log into your DVR using the username and password provided by the manufacturer. If this DVR has already been previously configured, use the admin login information.

Select the menu for Network Settings. In this section you will be able to assign an IP address to the DVR. This will be an internal static IP address. (This usually begins with 192.168.XXX.X). I would suggest using these settings to get started, you can always change them later.
  •          IP ADDRESS: 192.168.1.110 (This will be the ip address of the DVR)
  •          SUBNET MASK: 255.255.255.0 (Leave this unless your network has a modified subnet)
  •          GATEWAY: 192.168.1.1 (This will normally be the IP Address of your router)
  •          TCP PORT: 37777
  •          UDP PORT: 37778
  •        HTTP PORT: 88 (You can use port 80 but there are some Internet Service providers which block the use of port 80. I usually just change it to be on the safe side.)


Configure Your Browser’s Security Settings In Order To Download the DVR Web Service. In order for you to connect to your DVR internally or externally within your network, you’re going to have to make sure that your browser is able to download the web service from the DVR. Just go to Tools > Internet Options > Security.


In this tab, you will see a button that says Custom Level.


Click it and make sure that the option for “Download Unsigned ActiveX controls” has “Prompt” (or Enable) selected instead of Disable.


This will make sure that when you access your DVR, the prompt will allow you to install the ActiveX web service that allows you to remotely access and configure your DVR. You can do the same for the other ActiveX settings as well. Once you are done, close Internet Explorer then restart it to make sure the settings have taken change.
Connect to Your DVR Internally Using Internet Explorer. You should now be able to connect to your DVR internally within your network. This is a bit different from connecting to it externally. You will use the Static Internal IP Address and Port number that you configured on your DVR in order to do this. This will be ’192.168.1.110:88′ as you have configured in the second step. The ‘:88′ at the end is the port that you’ll be using to connect to the web service of your DVR.


Port Forward Your Router

The next thing you’re going to want to do is port forward your router. This is going to be necessary in order to connect to your DVR from a remote location. If you were to just type your external IP address into the browser, your router is not going to know which device you are trying to reach. There could be multiple computers and devices on that network so you need to tell the router which one to specifically connect to by assigning a sort of map to all of the ports you have configured.

Log in to your router using the gateway IP address and username and password that has been set to it. By default, most routers have their default gateway IP address set to 192.168.1.1. This is what you will type into the URL bar of your browser. Once you put that in and hit Enter, a window should pop up asking you to log in. If you haven’t made any changes you should be able to put ‘admin’ into the username and ‘admin’ into the password field as well. Some Routers may have their password defaulted to ‘password’. You will have to check your router manual or with your network administrator to be sure. You can also search on Google to find out the defaults.


Forward the Ports

Find the window or tab that is either called ‘port forwarding’ or ‘apps and gaming’. Go ahead and add a new port forwarding rule. The application name field is where you will put in anything you want that is descriptive to the device you’re port forwarding. In this case you can just put in “DVRWEB” to signify the DVR Web Service connection. External Port can be 88 (or whatever port you set it to on step 2), Internal Port is also set to 88, Protocol will be ‘both’ tcp/udp and the Device IP will be the IP of the DVR. In this case you will make sure it’s ’192.168.1.110′. Make sure the rule is enabled by checking the box if there is one and save the rule. Then do the same for your TCP And UDP ports that were set on the DVR. You should have:
DVRWEB – 88 – 88 – BOTH – 192.168.1.110 – Enabled
DVRTCP – 37777 – 37777 – BOTH – 192.168.1.110 – Enabled
DVRUDP – 37778 – 37778 – BOTH – 192.168.1.110 – Enabled


Find out your External IP Address 

Find the IP address of the network you’re currently setting up the DVR at by typing in “WHAT IS MY IP” into google. You will get your public IP Address and make sure to make a note of it. This is the address that you are going to use in order to connect to your DVR when you are in another location.

Connect from the Outside 

When you have the ability to connect from outside of the network you are in, type in your Public IP Address into the URL bar on Internet explorer and make sure to add the ‘:88′ at the end. You should see the ActiveX web service prompt. If you are able to connect to the DVR internally but are unable to once you are outside of that network, it will more than likely be a port forwarding issue. Check your settings and try again.

How to remote monitor your CCTV camera from the Internet?

Digital Video Recorder (DVR) Setup
How to remote monitor your CCTV camera from the Internet?

This procedure is basically a general procedure on how to view or monitor your CCTV camera from the Internet. I am pretty sure that all CCTV vendors/technicians are using the same steps that I will be mentioning below. It’s just a matter of brands of the devices like the router, dvr, cameras etc.
Note: You should already have knowledge to basic networking so that you can easily manage the below steps. This applies only to some small household that has Internet connection from home and no firewall.

Requirements:

Computer – either laptop or desktop
Router – connect two networks
DVR – Digital Video Recorder
Modem – Wired Internet
UTP cable – Cat5e Cable
RJ-45 – Connector

Procedures

From the computer:
Click Start button
Click Run
Type cmd.exe and press ok
Type ipconfig/all
Get the following IP addresses
Default Gateway
DNS Server
From the DVR:
R-click your mouse and click Menu
Select Network
Modify the following IP address using the above values that got from “From the computer” procedure.
Gateway
Primary DNS

From the computer again:

Open your web browser like Internet Explorer
Encode the IP address of your router, for e.g. http://192.168.0.1
Login to your router using administrator username and password
Look for the Virtual Server or Port Forwarding tab
Make a rule from the Port Forwarding tab like below
IP Address: IP address of your DVR
Name: CCTV Monitoring
Port: 80
End: 80
Click Apply and then Save.
Open another browser.
Type http://whatismyipaddress.com/

Take note of your own Public IP Address

DVR

Basic DVR Setup

All DVRs are definitely not made equal! There are several factors that are critical to consider when purchasing a DVR, especially when comparing price. The most important factors to look at are the number of cameras supported, frames per second (fps), compression technology, hard drive space, network connection / remote viewing capability, motion detection, scheduling, and ability to save video and audio to a CD or flash drive. You should also look for easy and comprehensive search capabilities (check out our 'Smart Search' technology) and audio support. The setup and user interface should be intuitive and easy to operate.
What are frames per second?
The frames per second (fps) relates to how many pictures the DVR will record in a second. Real time recording is about 30 fps on each camera. To calculate the fps per camera take the total fps in the system and divide it by the number of video inputs. For example, a 60 fps digital video recorder with 4 video inputs would result in about 15 fps per camera.

How big a hard drive do I need?
How does a CCTV digital video recorder work?

The amount of hard drive space is very important because it will limit how many days of recording you can store before the system has to start recording over the oldest video. Each DVR will have its storage capacity listed in the specifications. But this calculation is just a rough estimate as there are many factors that affect hard drive use. The most critical factor being the compression format used by the DVR (for more info on compression formats click here). But also the type of cameras that are connected to the DVR make a difference (specifically the chip size and resolution) and also the features that are selected on the DVR. If you use the scheduling or motion detection features or tune down the frame rate that will extend the storage capacity of the unit. Even the field of view (what you are recording) will affect the storage capacity - the more complex the image, the more hard drive space it will take to capture the complexity.
A CCTV digital video recorder (or “DVR” for short) is essentially a computer that saves security video images to a hard drive. Most security cameras in use today capture an analog picture. The DVR converts the analog signal to digital and then compresses it.

Many cameras can be connected to one DVR. DVRs generally come with 4, 8, 16, or 32 camera inputs. The DVR will allow you to view all of these images at once or one at a time and all of the video is saved to the hard drive. Additional switches, quads, or multiplexors are not required.

CCTV Camera Cables and Connectors


CCTV Camera Cables and Connectors

When looking for a security solution for your home or business, it is important to spend time researching which type of camera is best suited for your security needs. Not all camera cables and connectors are the same. There are three types of cables and connectors that are common in CCTV systems: BNC, DIN, and RCA. This guide will help you learn more about the advantages and disadvantages of each of these connectors, and how to convert between them.

BNC Connector


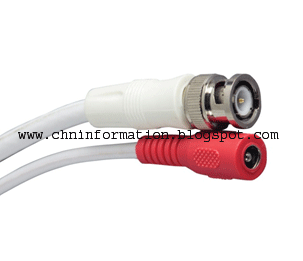
BNC is abbreviation for Bayonet-Neil-Concelman. It is an industry industry standard for transmitting a video signal over a coaxial cable. It features a unique locking mechanism to ensure the cable is firmly secured to the DVR/monitor and will not come loose. 


Advantages and Disadvantages of BNC

Advantages
Disadvantages
Industry standard for CCTV cameras
BNC cables are good for a distance of 300 ft. (depending on cable quality)
BNC cables lock in place, ensuring a consistent image and no unwanted disconnection
Requires a separate power source
Only transmits video

Does not support audio


DIN Connector

DIN is an abbreviation for Deutsches Institute for Normung. DIN connectors are round with pins arranged in a circular pattern, and can have either 4 or 6 pins (depending on model).

Example of a 6-Pin DIN Connection and Pin-out:

Pin 1: + 12V Input
Pin 2: Audio to Camera
Pin 3: Alarm Signal
Pin 4: NC (no use)
Pin 5: Audio from camera
Pin 6: Video from camera


Advantages and Disadvantages of DIN

Advantages
Disadvantages
Easy to connect
No need for a separate power source. The camera will be powered by the system.
Supports two-way audio (depending on camera model)
Only one cable required to run between the camera and the system
DIN cables are good for a distance of up to 300 ft
Easy to bend pins
Pin configuration is proprietary to the camera manufacturer so you cannot mix DIN cameras from different manufacturers
Not as common as BNC Cameras
Physical connection to the DVR / observation system is not locked-in, as compared to BNC connections


RCA Connector


RCA is a standard cable used to transmit analog video and audio between many devices such as TVs, VCRs, DVD players, stereo systems, and video game consoles. The yellow cable is for video. The black and red cables (or white and red) are used for audio: Black/White and Red cables are usually stereo; a single White cable is mono

.

Advantages and Disadvantages of RCA

Advantages
Disadvantages
Standard for audio and video in consumer electronics industry
Widely available accessories
Not as common as BNC Cameras
RCA cables are good for a distance of 180 ft, depending on cable quality
Physical connection to the DVR / observation system is not locked-in, as compared to BNC connections


6-Pin DIN Extension Cable

Simply use the high-performance 100 ft 6-Pin DIN Extension Cable (also available in 250 ft). Connections can be made up to 300 ft.


Extending DIN cables


Type
Terminating Connectors
Coupler
Distance
DIN
Female/Male
Not required

Up to 350 ft: (5 x 60 ft; 3 x 100 ft; 1 x 100 ft + 1 x 250 ft)


BNC Extension Cable

Simply use the 60 ft BNC / Power Cable or the 120 ft BNC / Power Extension Cable.

BNC Extension Cable Connections

Video Input Connections

Connect the BNC cable to the video input of the monitor, and connect the power adapter to an outlet.

Camera Connections


Connect the BNC and power cables to the camera.
Use the BNC (f) to BNC (f) Coupler to connect additional extension cables to each other.


Extending BNC cables

Type
Terminating Connectors
Coupler
Distance
BNC
Male/Male
BNC Female / Female
Model: BNCC
Up to 180 ft (3 x 60 ft)

NOTE: It is possible to run a single coax cable with BNC termination over longer distances. However, a power supply will be required near the camera.

Universal Extension Cable


Use the 100 ft Universal Surveillance Camera Extension Cable to extend and/or connect DIN, BNC, and RCA cameras to a monitor, TV, or observation system.

How to Convert Between Connectors

BNC to RCA

Use the BNC (female)-to-RCA (male) Coupler (model: BNCB) to convert CCTV standard BNC connectors to common RCA connectors. Simply connect the BNC connector to the BNC (female)-to-RCA (male) Coupler. Connect the coupler to the RCA port on the TV / monitor.
NOTE: BNC cameras terminate with a female connector. You need to use the included BNC extension cable (males in order to connect to a BNC input of an observation system/DVR.

RCA to BNC

Use the RCA (female) to BNC (male) Coupler (model: BNCA) to convert common RCA
 Connectors to CCTV standard BNC. Simply connect the RCA connector to the RCA
(female) to BNC (male) Coupler and then connect the BNC connector to the observation
system/DVR


DIN to BNC

Use the 6-Pin to BNC Cable Adapter to convert Lorex 6-Pin DIN connectors to CCTV standard BNC. Connect the 6-Pin DIN connector to the 6-Pin to BNC Cable Adapter, and then connect the BNC connector to the observation system / DVR. Connect the power connector from the coupler to a power supply.

NOTE: A regulated power adapter will be required (supplied with models: ACC1510, ACC1511) as power will no longer be supplied by the observation system/DVR.


Audio recording capability must be supported on the DIN camera. If audio is supported and you want to continue to record audio, make sure that an AUDIO IN port (RCA-female) is available on the system/DVR.

Check the instruction manual of your system for complete details.

BNC to DIN

Use an RCA to 6-Pin DIN Cable Adapter to connect CCTV standard BNC connectors to a Lorex system with 6-Pin DIN ports. Connect the BNC connector to the RCA to 6-Pin DIN Cable Adapter using the included BNC (female) to RCA (male) coupler (model: BNCB).


RCA to DIN

Use an RCA to 6-Pin DIN Cable Adapter to allow a connection between common RCA connectors (with power supply) and a Lorex system with 6-Pin DIN. Connect the yellow RCA (male) connector to the yellow RCA (female) connector on the RCA to 6-Pin DIN Cable Adapter. Connect the Power connector (female) from the RCA camera to the Power connector (male) on the RCA/Power to 6-Pin DIN Coupler. Connect the 6-Pin DIN (male) connector to a 6-Pin DIN (female) port on an observation system / DVR.

NOTE: If necessary, connect the 6-Pin DIN Coupler to a 6-Pin DIN Extension Cable.